-
GLOBAL
SITE -
LANG
- Select Language
- Afrikaans
- Albanian
- Arabic
- Armenian
- Azerbaijani
- Basque
- Belarusian
- Bulgarian
- Catalan
- Chinese (Simplified)
- Chinese (Traditional)
- Croatian
- Czech
- Danish
- Dutch
- English
- Estonian
- Filipino
- Finnish
- French
- Galician
- Georgian
- German
- Greek
- Haitian Creole
- Hebrew
- Hindi
- Hungarian
- Icelandic
- Indonesian
- Irish
- Italian
- Japanese
- Korean
- Latvian
- Lithuanian
- Macedonian
- Malay
- Maltese
- Norwegian
- Persian
- Polish
- Portuguese
- Romanian
- Russian
- Serbian
- Slovak
- Slovenian
- Spanish
- Swahili
- Swedish
- Thai
- Turkish
- Ukrainian
- Urdu
- Vietnamese
- Welsh
- Yiddish
-
통합검색 활성화
통합검색 닫기
검색창


Campus Life
Gyeongnam’s national flagship university representing Korea
Setting wireless router
Configuration for desktop/laptop
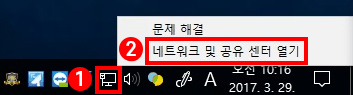
- 01.Click the right button of the mouse on the network icon at the taskbar.
-
02.Click "Open Network & Internet settings" on the dropdown menu.
-
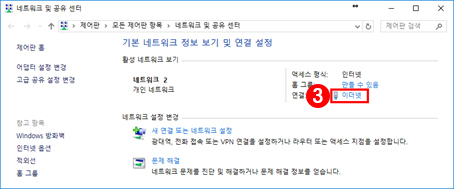
03.Click "Ethernet" (Windows 7 and later version) or "Local Area Connection" (previous version of Windows 7; hereafter "Ethernet").
-
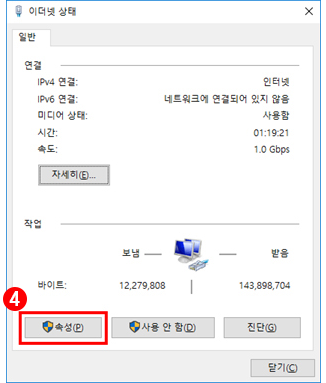
04.Click "Properties" on the Ethernet Status window.
-
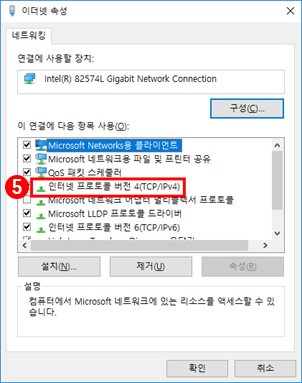
05.Double-click "Internet Protocol Version 4 (TCP/IPv4)" on the Ethernet Properties window.
-
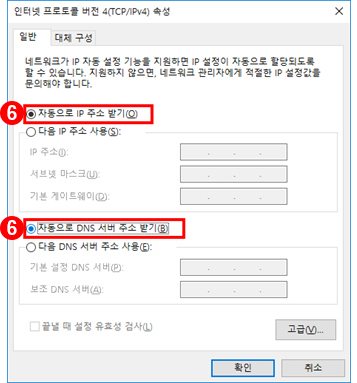
06..heck "Obtain an IP address automatically" and "Obtain DNS server addresses automatically" on Internet Protocol Version 4 (TCP/IPv4) Properties window.
-
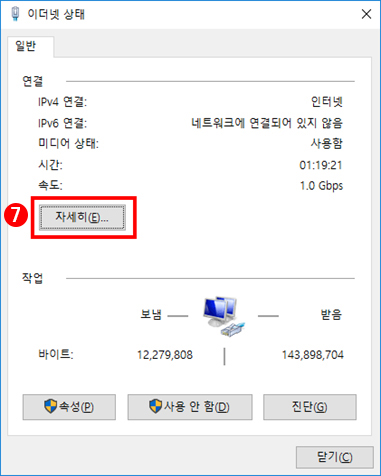
07.Click "Details..." on the Ethernet Status window.
-
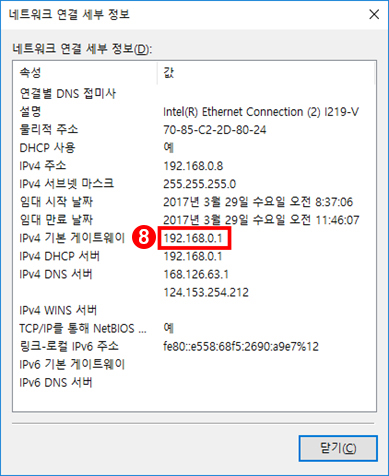
08.Check the value of IPv4 Default Gateway (default value: 192.168.0.1). (This value is necessary to access the router setting page.)
Router setting-up
The following setting is for wireless router models produced by 'IPTIME' brand. If you are using other manufacturer's models, refer to the attached user manual.
-
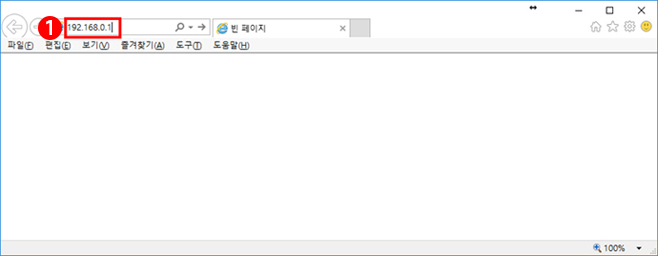
01.Open a window of Internet browser, and enter the gateway address specified on the Network Connection Details window.
-
02.Enter ID, password, and CAPTCHA characters (default: admin / admin)
If the window below does not appear, skip to the next step.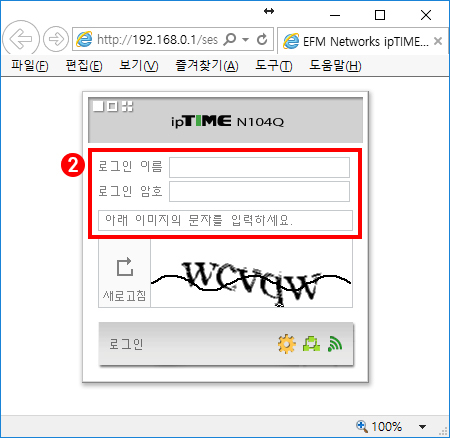
-
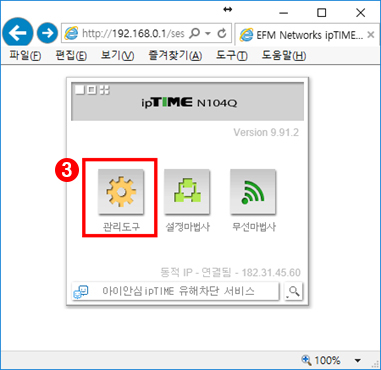
03.Click ‘SETUP’
-
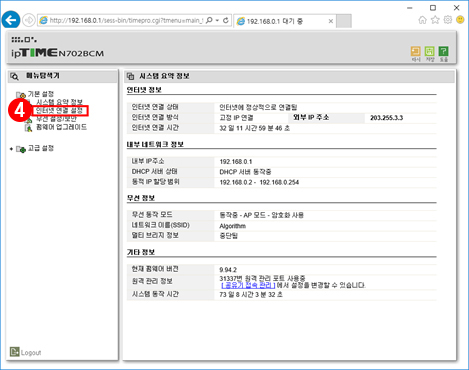
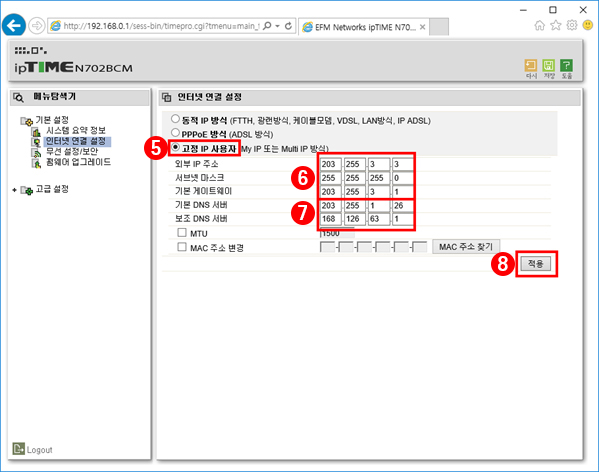
04.Click the "Internet setup" menu on the setup window.
- 05.Click "Static IP"
- 06.Enter the assigned address of IP, subnet mask, default gateway. (Contact Education IT Center [Tel. 772-0666, 0618] to identify the addresses.)
- 07.Enter "203.255.1.26" for Primary DNS and "168.126.63.1" for Secondary DNS.
-
08.Click ‘Apply’
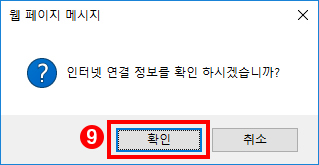
-
09.Click "OK" on the alert window.
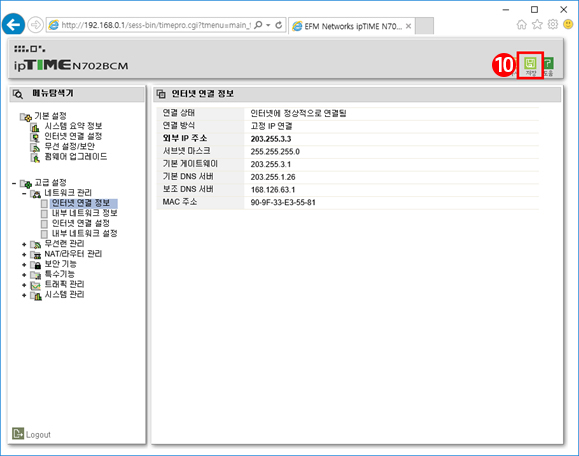
-
10.Click "Save" icon on the upper right side, and then end the setup.